Clip Operation
Computes the geometric difference between two Layers.
The Clip Operation takes the features from a Clipping vector Layer and a Source vector Layer and uses them to compute the geometric difference between the Source and the Clipping layers, and stores the result on a third Layer.
It is possible to use the selected features, if a selection is set, on both the clipping and the source Layers to limit the scope of the operation.
Neither of the Layers used to compute the difference gets modified by any means, but a third Layer is created by default, or the user could select an existing Layer where to store the result.
Sample Usage
We’ll start this usage example by selecting a single feature from the municipalities layer which we’ll use as the clipping mask against the voting areas layer.
Figure 1 shows the selected Feature, “Victoria” on the municipalities layer.
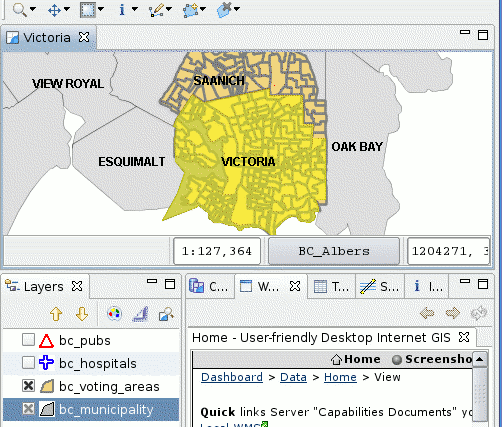
Figure 1. Define clip mask through BBox selection.
- Now go to the Spatial Operations View, and select Clip from the Operation drop down.
- The Clip Operation‘s specific input options will show up.
Now is time to indicate the operation’s inputs, as shown in Figure 2:
Select the Source Layer
From the Layer to Clip drop down, select the Layer containing the Features to apply the difference to with the clipping Layer.
Select the Using Layer
From the Using Layer drop down, select the layer to use as cutting mask.
Select the *Result* Layer
At the Result Layer drop down, a tentative Layer name will be proposed for the layer the operation will create. You can change the name or select an existing Layer where to store the results.
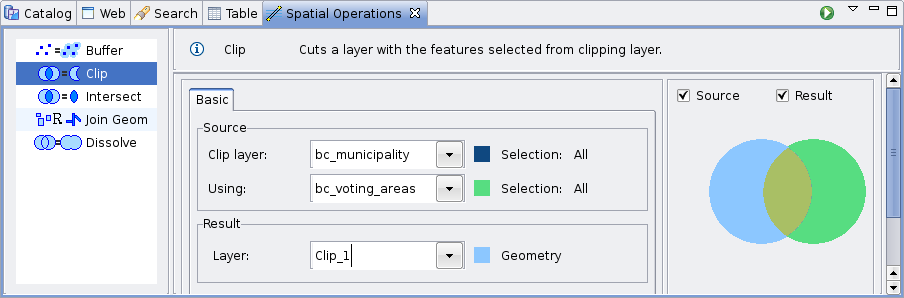
Figure 2. Define input and target layers.
Perform the operation
Once the input and target layers are defined, press the Perform button at the Spatial Operations View tool bar. The operation will begin processing and its progress will be shown up on a progress dialog, as shown in Figure 3. The operation may take a while to complete, depending on the amount and complexity of the input geometries.
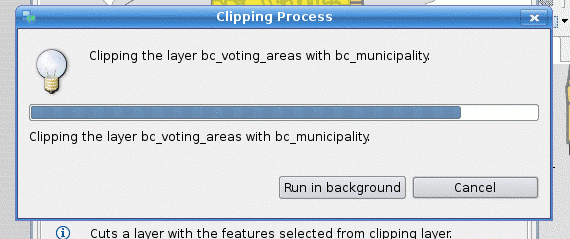
Figure 3. Progress dialog.
Once the Operation finishes, if a new Layer were created to hold the result, it will be automatically added to the current Map.
Figure 4 shows the newly created Layer (Clip-1, in green) added to the map, with the Features resulting of applying the difference between the Source and Clipping Layers.
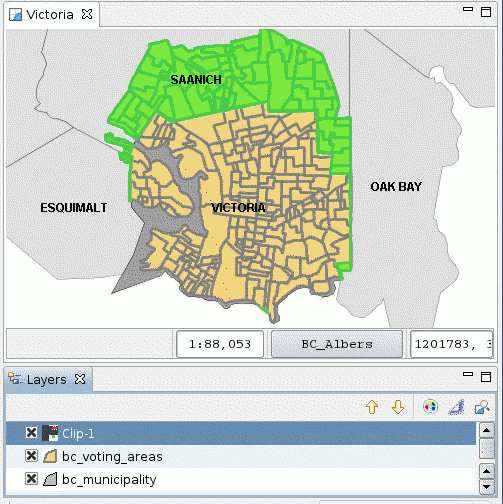
Figure 4. Result Layer